Want to brew Kombucha at home?
Kombucha is a beverage that is both is a tasty and refreshing on warm days, as well as on sultry winter afternoons.
What’s more, it’s a drink that’s packed full of living bacteria to help feed and develop healthy gut bacteria – helping to ease bloating symptoms and improve digestion, immunity, and even boost our serotonin levels (over 80% is stored in the gut.)
It’s a really rewarding process to make at home, and you can do so with a few common ingredients.
For 3L Brew:
1 3-4L glass container
1 x Wooden spoon
Paper towels & Rubber bands
Muslin cloth (Or cotton tea towel)
3L Pure Water
1 cup Organic Sugar
4 bags Black tea
250ml of starter Kombucha
1 x Scoby per ferment jar
Instructions
1. Brew a pot of tea:
Bring 500ml of pure, filtered/spring water to boil, then turn off heat and stir in sugar to dissolve. Drop in chosen tea bags and allow to seep until water has cooled.
2. Add Kombucha starter
When water cools, use wooden spoon to fish out tea bags, and transfer cold brew into glass fermentation jar. Next, pour in the starter tea. This liquid (full of living enzymes & bacteria) helps to create the optimal environment for the SCOBY to thrive. Finally, top up with the remaining 2.5L water.
3. Bathe mother SCOBY
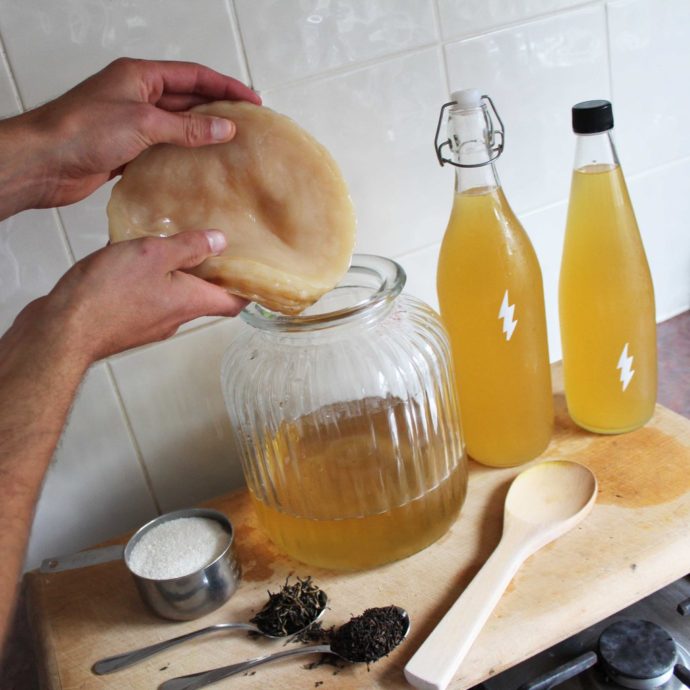
With clean hands full of love, pick up SCOBY mother and slide into cold tea brew. The smooth side should be facing up. Cover the jar with a paper towel, and secure with rubber band.
4. Ferment for 7-10 days
Place jar at room temperature, and out of direct sunlight – don’t let her get jostled/disturbed. In a loving, warm/ish cupboard in the kitchen away from chemicals and electromagnetic disturbances is ideal.
You may find that your SCOBY forms a younger layer on top, which can be shared with a friend, or used to start another brew. Healthy fermentation signs include; brown stringy floaties, sediment collecting at bottom, and bubbles forming around SCOBY.
5. Test your brew
After 5-6 days, sample your batch by pouring a small cup – remember not to use metal. We are looking for a balance between sweetness and tartiness, meaning the more days you ferment, the more vinegary it will become.
6. Remove your SCOBY
Once you are getting a tart yet sourish taste, your Kombucha is ready to bottle. Before proceeding, measure another cup of starter liquid to place your SCOBY in during transfer process.
7. Bottle the goods
Through a small funnel, pour fermented kombucha (straining with muslin cloth if desired) into sealable glass bottles. Leave about a thumb-width of head room in each. During this stage, you may wish to add additional flavours to your brew; you might try ginger, fruit, herbs, spices or teas.
8. Secondary Ferment
Store your bottled kombucha at room temperature, and out of sunlight for 1-3 days to naturally carbonate. Afterwards, refrigerate to stop fermentation and carbonation process. Consume within 6 weeks.
9. Do it all again
You can now use your SCOBY (Symbiotic Culture of Bacteria & Yeast) to repeat step one and brew another batch. Over time, your SCOBY supplies will double, so make sure to share the love.
Courtesy: Graedon Parker, www.organicmechanic.co.nz


